On this page
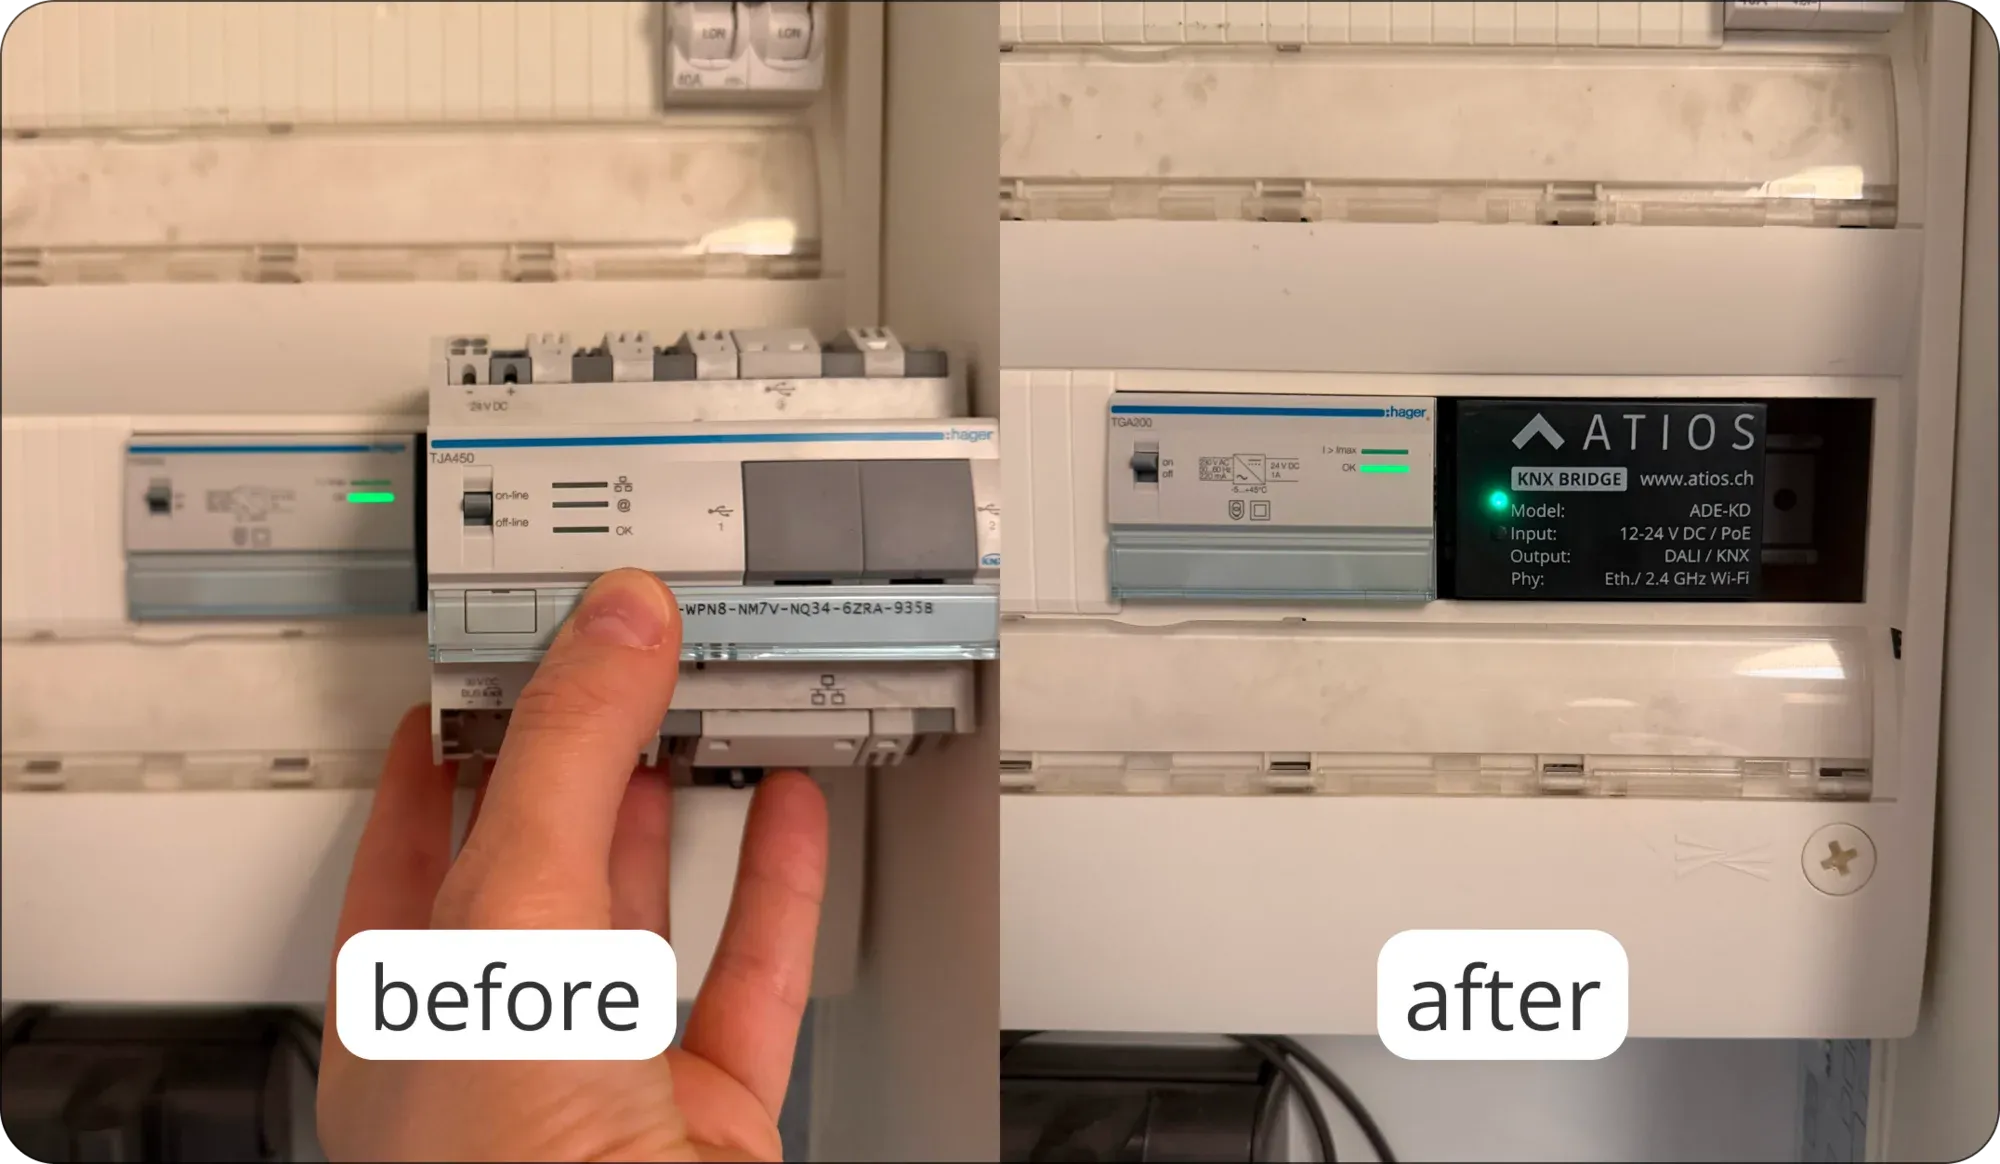
Last week, Yann reached out to us with a familiar problem: his Hager TJA 450 server needed replacing and he wanted to modernise his existing KNX installation. He wanted modern app control and convenience smart home features without replacing the whole KNX system. Like many homeowners with older KNX systems, Yann wondered if he'd need an installer, special configuration tools, or even rewiring. The answer is simple: just replace the old server with Atios KNX Bridge, and everything else stays the same. Here's how you can do it too.
Why switch from Domovea to Atios KNX Bridge?
This is what you get:
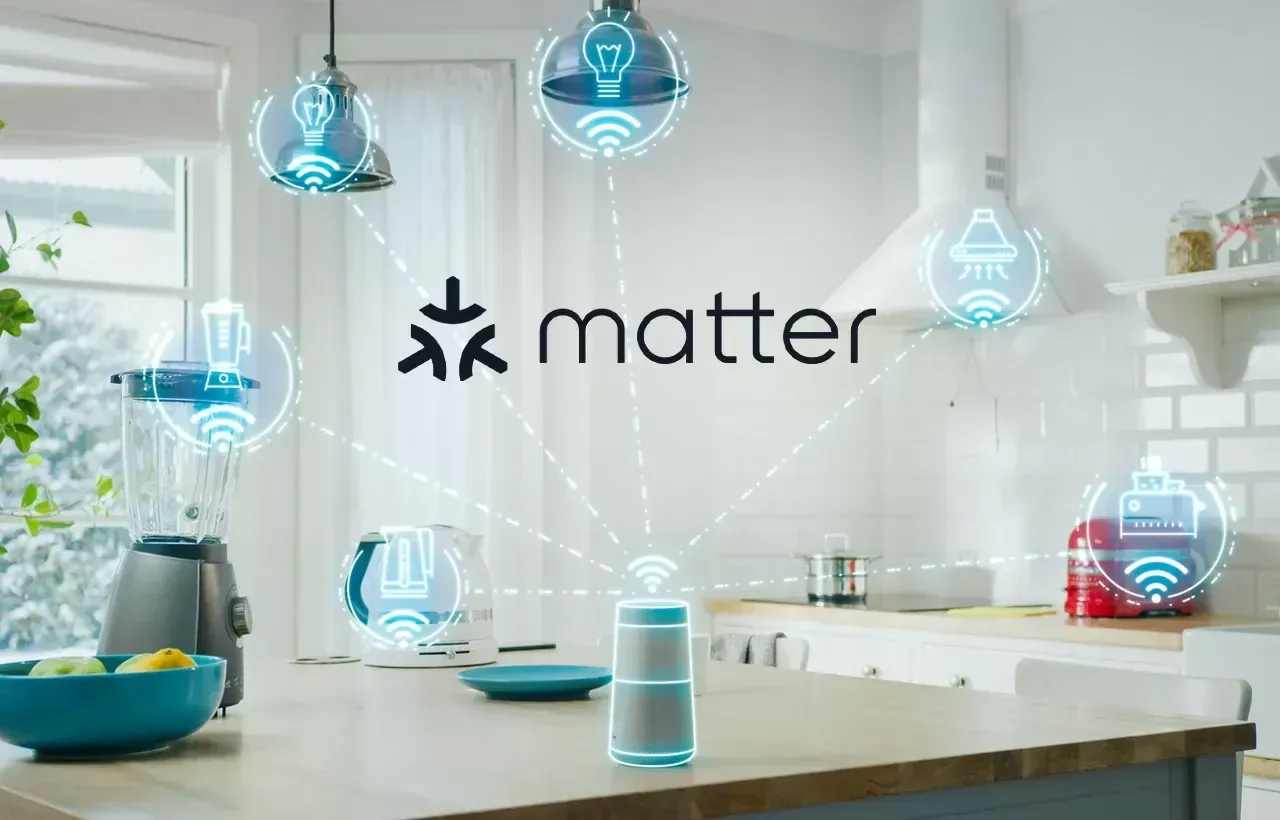
- Matter Compatibility: With Matter, the new smart home standard, your system stays compatible as technology evolves.
- Modern App Control: Control your entire home through Apple Home, Google Home, Amazon Alexa, or Samsung SmartThings - easy to use apps already on your phone.
- Voice Control: "Hey Siri, turn off all lights" or "Hey Google, close the blinds" - your KNX system responds.
- Easy Access Sharing: Give family members access in seconds.
- Add More Devices: Integrate sound systems, cameras, door locks, vacuum robots or any other Matter-compatible device into your system.
- Local & Secure Control: Everything runs locally on your network. Your smart home works even when the internet is down.
How to Replace Domovea with Atios KNX Bridge
The good news: you don't need to replace your Hager devices. Your existing KNX installation stays exactly as it is.
What You Need:
- Atios KNX Bridge
- Access to your electrical cabinet
- Your existing KNX group addresses
Step-by-Step Process
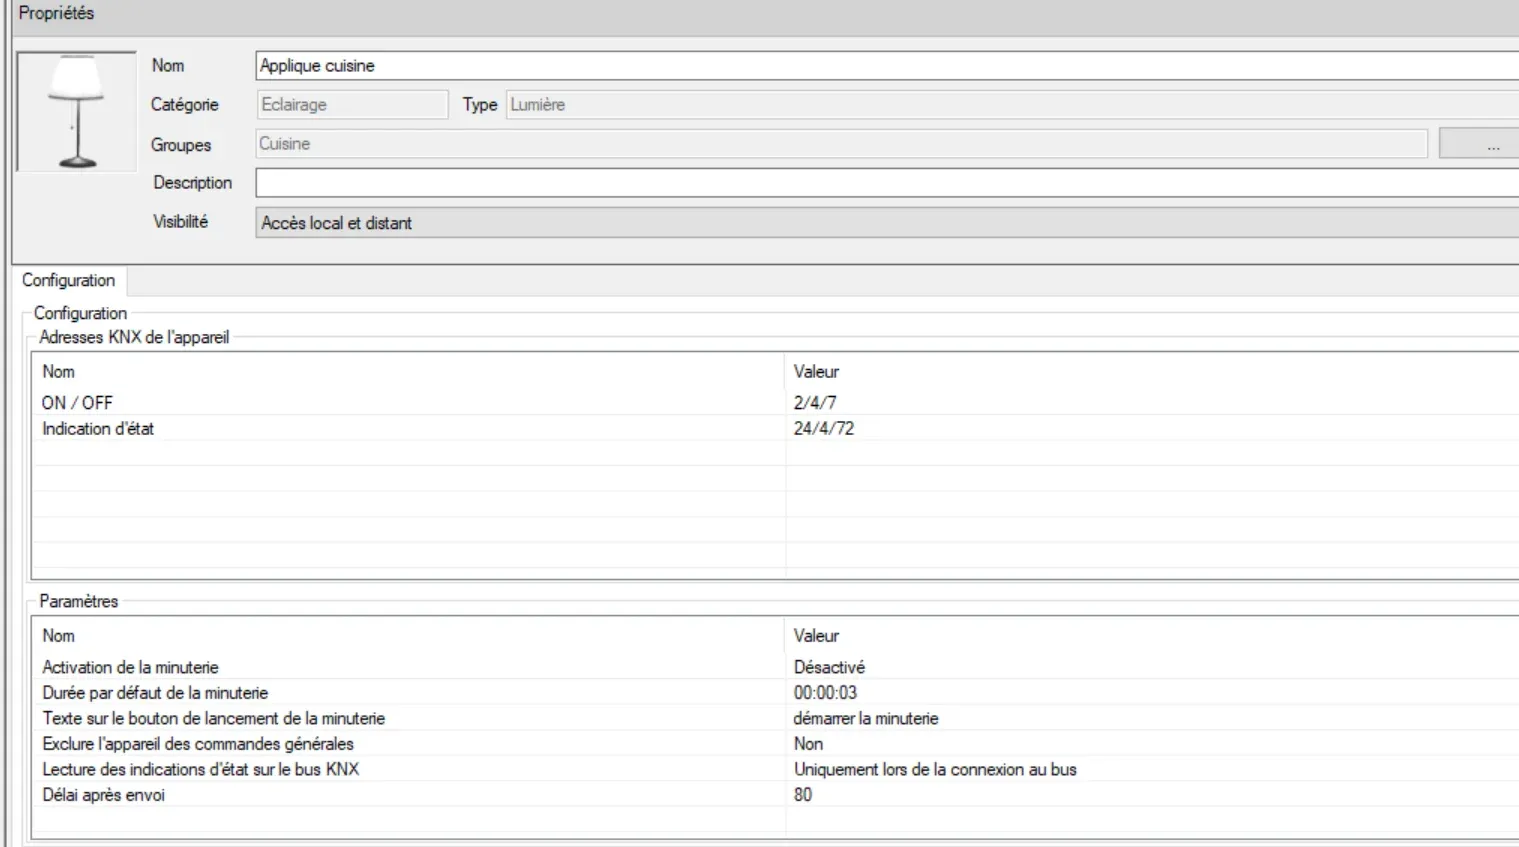
1. Gather Your KNX Configuration
Access the Domovea Configuation Tool to gather the existing KNX group addresses of your lights, blinds etc: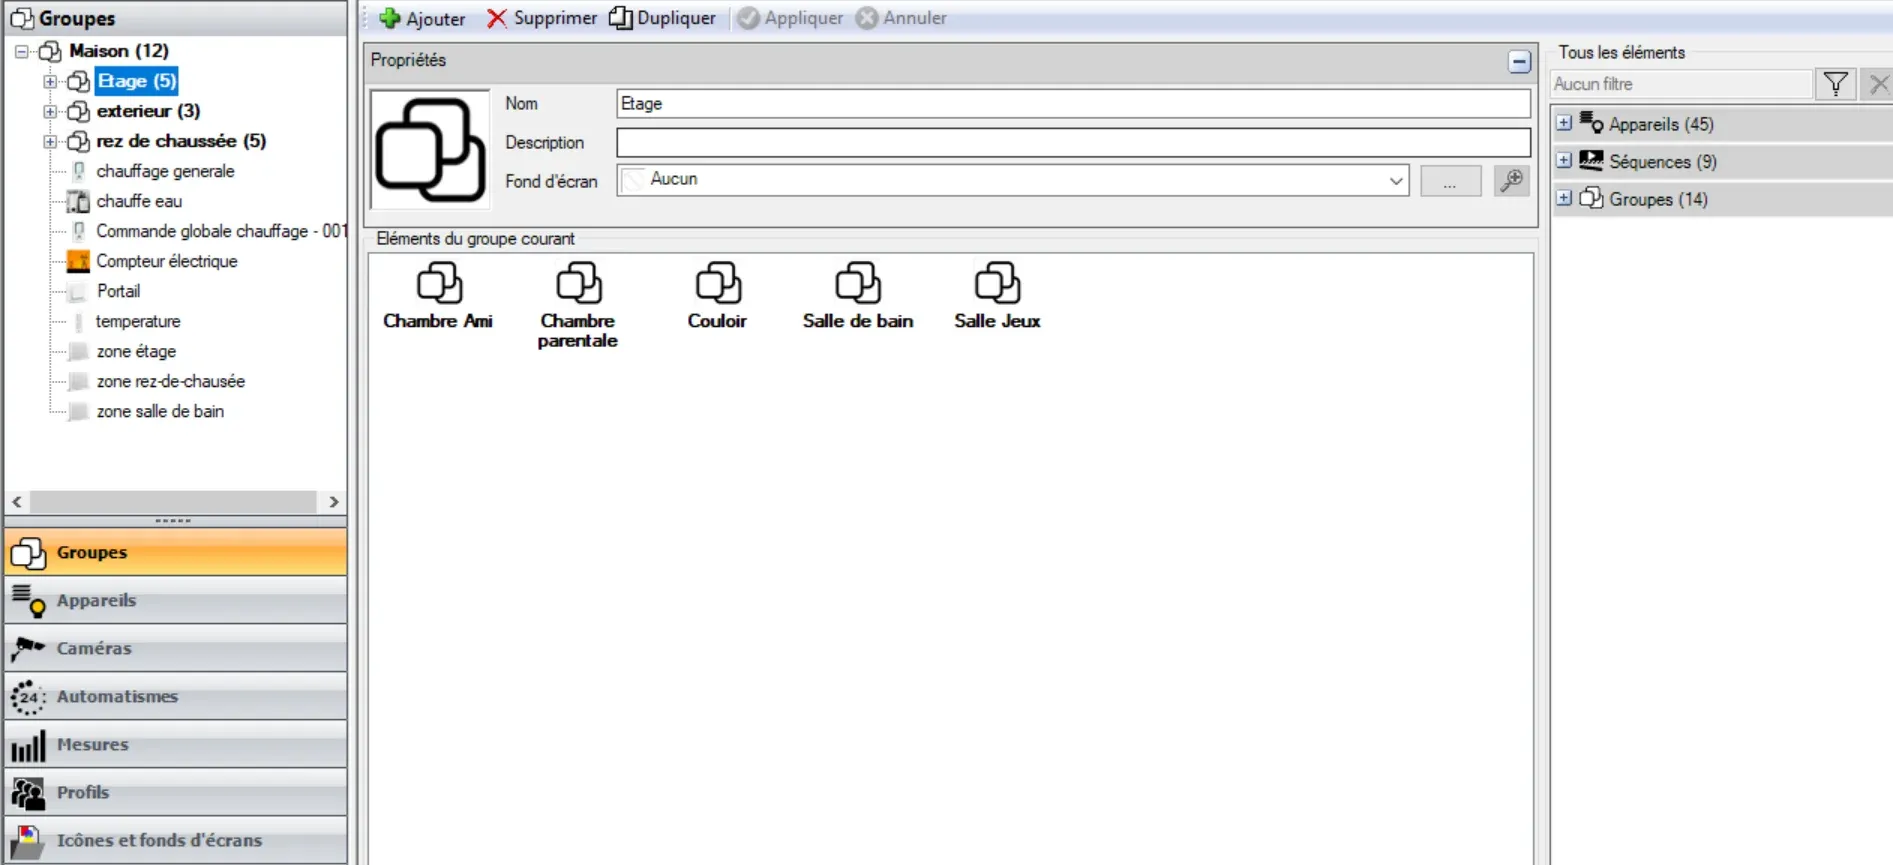
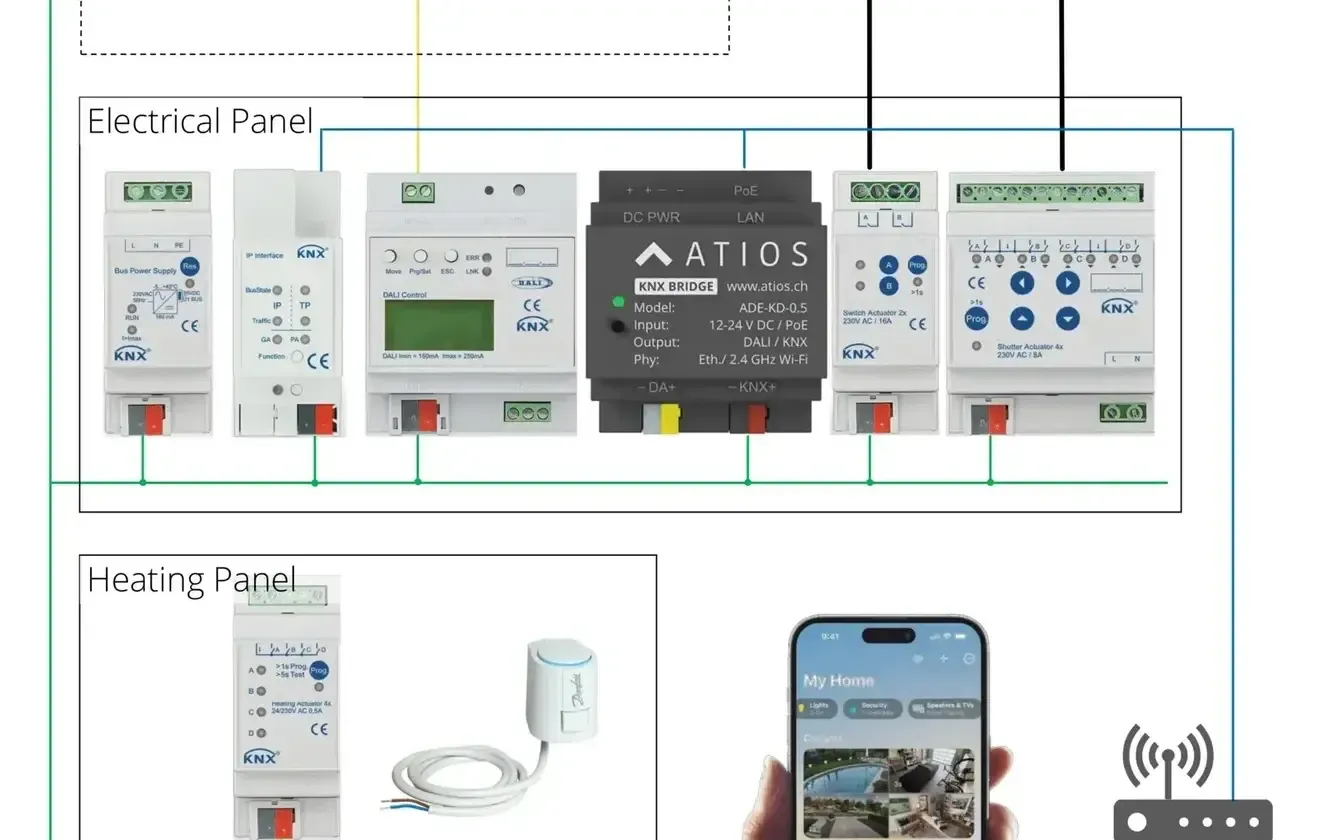
2. Install Atios KNX Bridge
Install the Atios KNX Bridge in your electrical cabinet. Connect it to your existing KNX System via the KNX port and to network access and power via the ethernet port (alternatively you can use the 12-24V DC power supply and WiFi).
3. Configure Atios KNX Bridge
Open your browser and go to connect.atios.ch to find your Atios KNX Bridge. The web interface is simple and straightforward. You can try a demo here.
Now simply transfer the same group addresses from your Domovea configuration into the web interface of Atios KNX Bridge: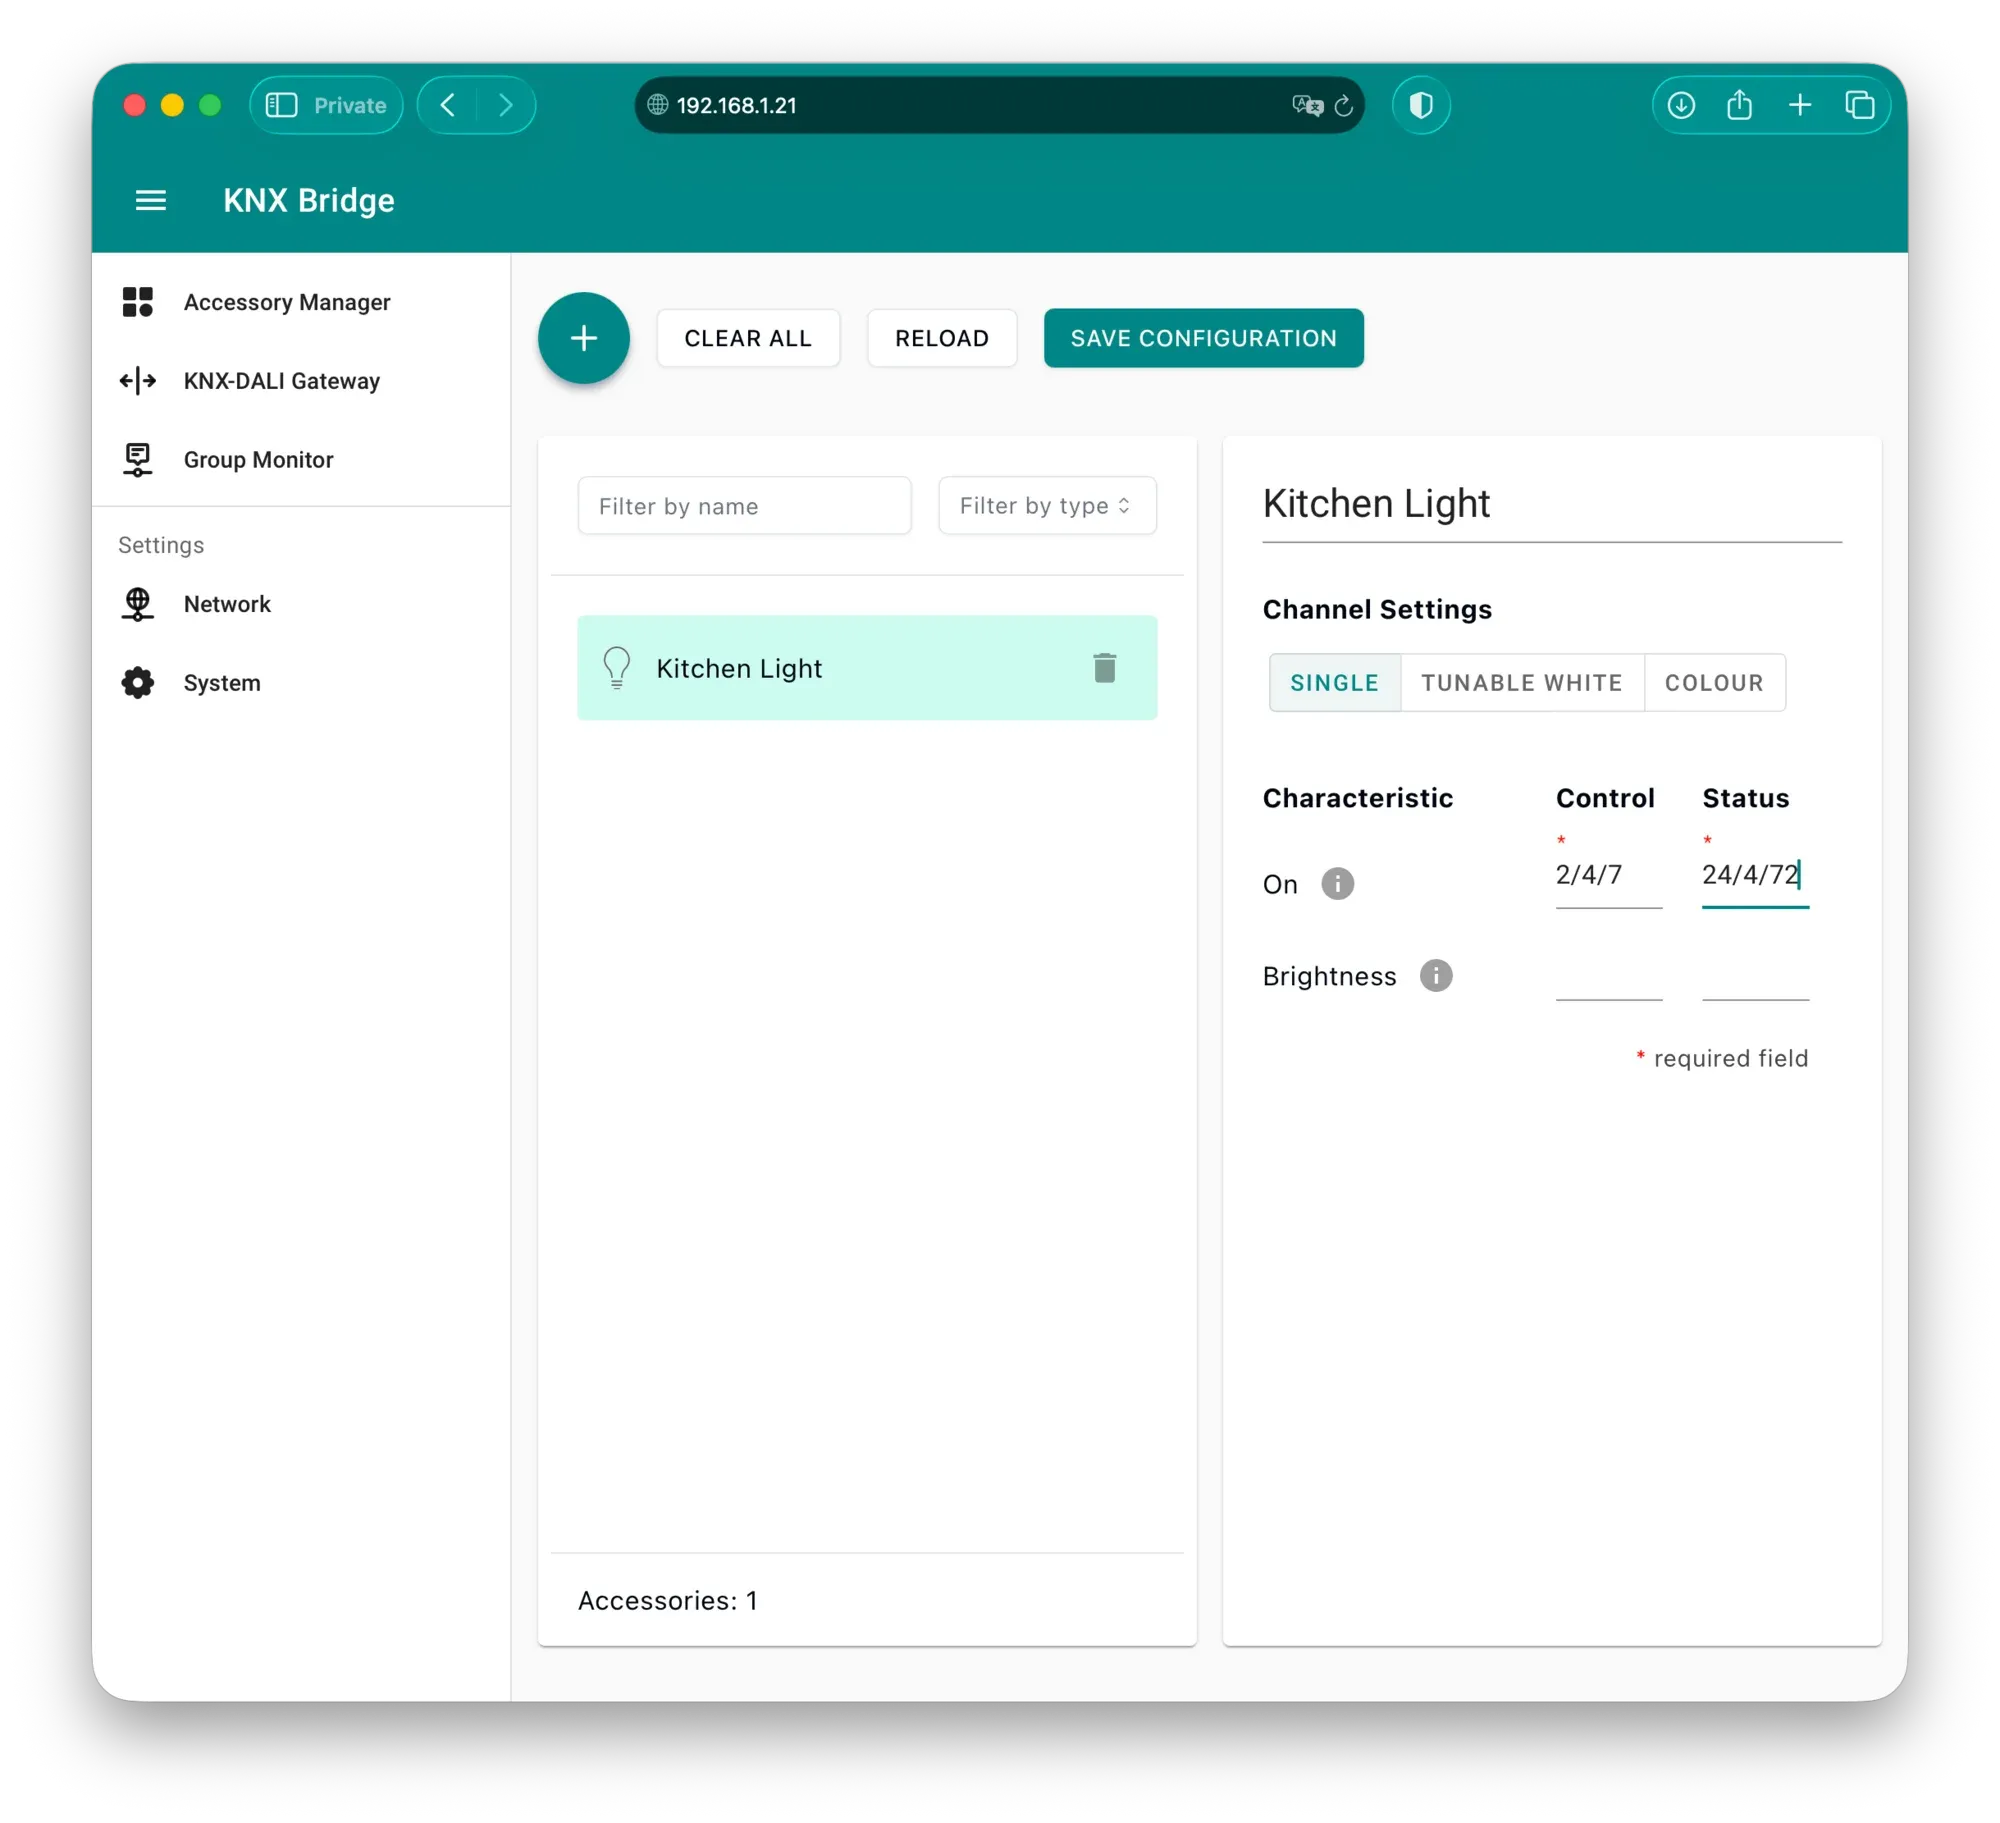
4. Scan QR Code
Scan the Matter QR code displayed in the web interface under System Settings with the app of your choice (Apple Home, Google Home, ... ).
All your devices instantly appear in your chosen app.
What About Scenes?
If you have a "turn off all lights" button or other scene controls on your Domovea server, you can recreate them easily within the app. For example, create a "Leaving Home" scene that closes all blinds, turns off all lights, and locks smart doors - all with one tap or voice command. There are no limits to your imagination.
Do You Need Professional Help?
For physical installation: If you're comfortable working in your electrical cabinet, you can install Atios KNX Bridge yourself. Otherwise, any electrician can handle the installation - it's straightforward.
For configuration: You can configure everything yourself through the web interface. If you have your Domovea configuration available, transferring the settings takes 30-60 minutes.
Ready to Upgrade?
Replacing your Hager Domovea server with Atios KNX Bridge brings your KNX system into the modern smart home ecosystem. You keep everything that works and gain the convenience of universal app control and voice assistants.
Do you have questions about replacing your Domovea system? Contact us directly.
Continue reading
Planning a KNX Home: A Practical Beginner's Guide
Build a rock-solid KNX home with modern app control — Apple Home, Google Home and Matter via Atios KNX Bridge.
Understanding Matter
Heard about Matter and wondered what it is? A plain-language breakdown for your smart home.
The easiest KNX-DALI Integration
Commission DALI lights right from your browser — no DCA apps, no Windows, no ETS detours.